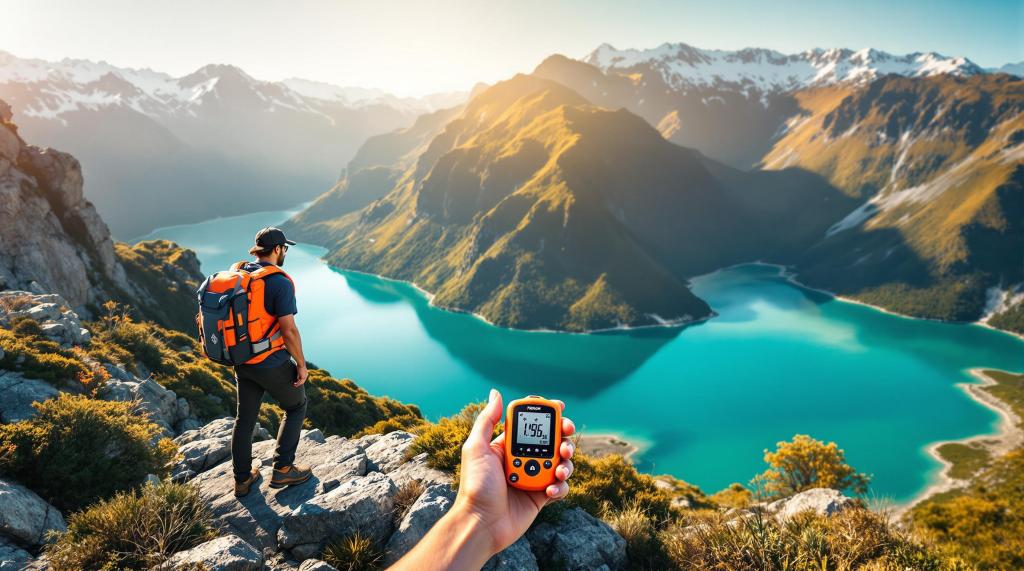
Emergency locator beacons (ELBs) are essential safety devices for outdoor activities in New Zealand, where remote terrain often limits regular communication. These devices send distress signals to rescue teams via satellites, saving lives in emergencies. Here’s what you need to know:
-
Types of Beacons:
- PLBs: For hikers and individuals, manual activation, 24+ hours battery life.
- EPIRBs: For maritime use, automatic activation in water, 48+ hours battery life.
- ELTs: For aircraft, activate on impact, mandatory for aviation.
-
Key Features to Look For:
- Long battery life (5+ years shelf life).
- GPS capability for accurate location.
- Durability (waterproof, rugged design).
- Lightweight and portable.
-
Legal Requirements:
- Registration: All beacons must be registered at beacons.org.nz.
- NZ Coding: Devices must be coded for New Zealand for faster rescue.
- Maintenance: Regular testing and battery checks are mandatory.
-
Costs:
- PLBs: $400–$570.
- EPIRBs: $690–$795.
- Rentals are available for occasional use.
-
Usage Tips:
- Activate only in life-threatening emergencies.
- Move to an open area for better signal transmission.
- Stay in one place after activation to assist rescuers.
Quick Comparison:
| Beacon Type | Best For | Activation | Battery Life | Cost Range |
|---|---|---|---|---|
| PLB | Hiking/Backcountry | Manual | 24+ hours | $400–$570 |
| EPIRB | Maritime Use | Automatic | 48+ hours | $690–$795 |
| ELT | Aviation | Impact | Varies | Mandatory |
Proper care, testing, and registration ensure your beacon is ready to save lives when needed. Read on for a detailed guide to choosing, using, and maintaining your beacon.
Distress Beacons 101: The Difference Between PLB and Satellite Messenger Device
Emergency Locator Beacons Explained
Emergency locator beacons are life-saving devices that send distress signals through satellite networks to alert rescue teams in emergencies. These tools are recognized worldwide for their critical role in rescue operations and rely on the Cospas-Sarsat satellite system.
3 Main Beacon Types
Different types of emergency beacons are designed for specific environments and purposes:
Personal Locator Beacons (PLBs)
- Small and portable, perfect for individual use.
- Commonly used by hikers, hunters, and mountain bikers in New Zealand’s backcountry.
- Must be manually activated.
- Operate for at least 24 hours at -20°C.
- Cost ranges from $400 to $570.
Emergency Position Indicating Radio Beacons (EPIRBs)
- Made for maritime use, these beacons activate automatically when submerged in water.
- Transmit for a minimum of 48 hours.
- Required for commercial vessels and priced between $690 and $795.
- Vital for New Zealand’s maritime industries and communities.
Emergency Locator Transmitters (ELTs)
- Installed in aircraft, these beacons activate upon impact.
- Mandatory for commercial aviation.
How Beacons Send Signals
Emergency beacons operate on the 406 MHz frequency, monitored by the Cospas-Sarsat satellite system. Each device transmits a unique digital code, known as a HEX ID, which provides details about the owner and their trip.
"The goal is always to locate and rescue those in danger as quickly as possible." – MRT Author
Here’s how the signal process works:
- The beacon is activated, sending out a distress signal.
- Satellites pick up the signal and forward it to ground stations.
- Mission Control Centres coordinate with local rescue authorities.
- Rescue teams are dispatched to the location.
Beacons equipped with GPS offer precise location data, improving response times. In New Zealand, all beacon activations are managed by the Rescue Coordination Centre New Zealand (RCCNZ).
While understanding how these devices work is important, it’s equally crucial to be aware of the regulations surrounding their use in New Zealand.
NZ Laws and Rules for Beacons
New Zealand enforces strict guidelines for emergency locator beacons, outlined in the NZSAR Beacons and Satellite Emergency Notification Devices (SENDs) Guideline 2022 [1]. These rules are designed to ensure proper use and efficient emergency response across the country.
How to Register Your Beacon
All 406 MHz beacons in New Zealand must be registered through beacons.org.nz. Here’s what you need to know about the process:
- Initial Registration: Provide your personal details, emergency contact information, beacon specifications (such as model and HEX ID), and the intended activities for its use.
- Keeping Registration Updated: Update your contact details and review your registration annually. If you’re selling or transferring the beacon, notify RCCNZ.
- For Businesses and Rentals: Rental companies must update registrations after each rental, keep accurate user records, and ensure staff are trained in using the devices.
Required Codes and Fines
All emergency locator beacons must be coded specifically for New Zealand to enable accurate identification by local rescue teams [1].
| Requirement | Details | Consequences |
|---|---|---|
| Registration | Must register at beacons.org.nz | Risk of fines and penalties |
| NZ Coding | Beacons must be NZ-coded | Delayed rescue responses |
| Corporate Use | Update records regularly | Potential legal issues |
Under the Health and Safety at Work Act 2015, businesses are required to maintain their beacons, check batteries, train users, and document their usage to meet workplace safety standards [1].
"The provision of emergency location equipment does not relieve the Person Conducting a Business or Undertaking of their primary duty of care." – NZSAR Beacons and SEND Guideline 2022 [1]
To comply fully, beacon owners should include them as part of a broader safety plan, alongside tools like radios or satellite phones. Following these rules ensures you’re prepared and equipped to handle emergencies effectively.
Picking the Best Beacon
After confirming your beacon complies with New Zealand’s regulatory standards, the next step is finding the device that suits your specific needs. Your choice will depend on the type of outdoor activities you engage in and the challenges posed by New Zealand’s varied terrain.
Key Features to Look For
When choosing an emergency locator beacon, focus on these important features:
| Feature | Why It Matters | What to Look For |
|---|---|---|
| Signal Range | Impacts rescue speed | Better performance in open areas; varies by terrain |
| Battery Life | Crucial for extended trips | Shelf life of 5+ years, operational for 24+ hours |
| Durability | Handles rugged conditions | Waterproof rating of IPX7 or higher |
| Size/Weight | Easy to carry | Compact and lightweight, ideally under 300g |
Beacon Comparison Guide
Here’s a quick look at some popular models and how they perform in New Zealand’s unique conditions:
| Model | Best For | Battery Life | Key Features |
|---|---|---|---|
| Garmin inReach Mini | Hiking/Backpacking | 50 hours (10-min tracking) | Two-way messaging, GPS tracking |
| ACR ResQLink View | Marine Activities | 28 hours continuous | Durable build, digital display |
| DeLorme inReach SE+ | General Outdoor Use | 100 hours (10-min tracking) | Weather updates, lightweight design |
Your beacon is just one part of a complete safety plan. It’s wise to pair it with tools like radios or satellite phones. When deciding, think about the terrain you’ll encounter, the typical weather, and the length of your trips.
Once you’ve chosen the right device, make sure you’re familiar with how to use it effectively in emergencies. That knowledge can make all the difference.
sbb-itb-0f2357b
Using Your Beacon Correctly
The Rescue Coordination Centre New Zealand (RCCNZ) stresses that using your beacon correctly is essential for fast and effective rescue efforts.
Emergency Situations
Beacons should only be activated in life-threatening emergencies. Here are some examples:
| Situation | When to Activate | Key Considerations |
|---|---|---|
| Severe Injury | If immobilized or experiencing extreme pain | Keep a record of symptoms |
| Medical Emergency | When urgent medical care is needed | Provide details about the condition |
| Lost/Stranded | If you’re completely lost and unable to self-rescue | Try to move to a visible location if possible |
| Severe Weather or Hazards | When faced with dangerous weather or terrain | Find shelter but ensure the signal remains clear |
Activation Steps
To activate your beacon effectively:
- Move to an open space with a clear view of the sky and extend the aerial fully.
- Follow the instructions provided by the manufacturer.
- Stay in one place after activation.
- Take note of your location and the details of the emergency to provide rescuers with accurate information.
In areas like mountains or dense bush, try to relocate to a visible spot such as a ridge, clearing, or riverbed to help rescuers locate you faster.
What Happens After Activation
Once you activate your beacon, RCCNZ immediately begins organizing the rescue. Here’s how the process unfolds:
1. Signal Transmission
Your beacon sends your GPS location and a unique identifier to RCCNZ via satellite.
2. Rescue Team Deployment
Rescue teams are dispatched based on your location and the nature of the emergency.
3. Your Role During Rescue
Allan Uren from Wanaka LandSAR highlights the importance of preparation: "It was really weird that the injured person could still walk and nobody had scoped out a place for the helicopter to land on the right side of the river so we could pick him up easily." [1]
Tip: Use tools like lit cellphone screens or reflective tape to help rescuers spot you. These can be seen from up to 1 km away with night vision.
Proper activation is just one part of the equation. Regular maintenance and testing are key to ensuring your beacon works when you need it most.
Beacon Care and Testing
Taking care of your emergency locator beacon and testing it regularly is crucial to ensure it works when you need it. Surprisingly, over 60% of PLB owners don’t know when their device’s battery expires.
Battery Management
Proper battery care is key to keeping your beacon reliable. Here’s what you need to know:
| Battery Aspect | Requirement | Action Needed |
|---|---|---|
| Expiration Check | Every 6 months | Look for the date stamp on the device |
| Replacement | Before expiry date | Contact an authorized service center |
| Storage Temperature | 15-25°C (59-77°F) | Keep away from extreme heat or cold |
| Professional Service | At battery change | Get a full inspection and testing |
"Battery replacement includes servicing the beacon by replacing all O-rings, pressure testing for water and dust compliance and re-testing all the internal electronics so that you be reassured your ACR Personal Locator Beacon is ready when you need it." – WILCO MARINE SERVICES [1]
Testing Your Beacon
Testing your beacon monthly ensures it stays reliable. Follow these steps:
- Use the self-test mode recommended by the manufacturer.
- Inspect for visible damage, corrosion, or signs of water entry.
- Clean it with a soft cloth and water only – skip household cleaners.
Once testing is complete, focus on proper storage to extend its lifespan.
Storage Tips
Storing your beacon the right way helps maintain its performance. Keep these tips in mind:
| Storage Aspect | Recommendation | Reason |
|---|---|---|
| Location | Cool, dry place | Prevents moisture damage |
| Position | Antenna in "off" position | Avoids accidental damage |
| Protection | Use a dry bag | Adds extra moisture protection |
| Accessibility | Store in an easy-to-reach spot, like a waist belt or chest harness | Quick access during emergencies |
If you spot any damage during routine checks, send your beacon to an authorized service center immediately. For ACR Personal Locator Beacon users, battery replacement also includes O-ring replacement, pressure testing, and electronics inspection to ensure it’s ready to go when you need it most.
Summary
Emergency locator beacons are essential for outdoor safety in New Zealand, with over 130,000 currently in use. Knowing how to register, use, and maintain these devices can make a huge difference in critical situations.
Legal Requirements and Registration
Registering your beacon with RCCNZ is both mandatory and free. RCCNZ Manager Mike Hill highlights the importance of registration:
"We believe about 30% of the beacons in New Zealand are unregistered, so potentially 30% of the people feel that they’ve got the insurance policy and are carrying beacons."
Unregistered beacons can delay rescue efforts, so make sure your details are up to date.
Beacon Types and Technology
Modern 406MHz beacons are far more accurate and reliable than older analog models:
| Feature | 406MHz Beacons | Older Analog Beacons |
|---|---|---|
| Location Accuracy | Within 5 km | Up to 20 km |
| Satellite Coverage | Global | Limited |
These advancements mean faster and more precise rescues.
Cost and Safety Considerations
New beacons cost between $300 and $700, but rental options are available for those who need them occasionally. However, a beacon alone isn’t enough. It should be part of a broader safety plan that includes thorough preparation and clear communication. Check out Live Outdoors for detailed safety checklists tailored to New Zealand’s unique conditions.
Performance and Reliability
Although 91% of beacon signals are false alarms, proper registration and usage can help reduce unnecessary callouts. Regular maintenance and testing are key to ensuring your beacon works when it’s needed most.
"When in doubt, activate your beacon to ensure help arrives." – Rescue Coordination Centre NZ
To maximize reliability, keep your beacon well-maintained, test it regularly, and ensure it’s registered with current details. Always opt for a New Zealand-coded beacon to ensure the fastest emergency response within the region.
For more outdoor safety tips, gear reviews, and adventure guides specific to New Zealand, explore Live Outdoors’ extensive resources.
FAQs
Can you take a PLB on a plane in NZ?
Yes, you can bring a Personal Locator Beacon (PLB) on flights within New Zealand, but there are specific rules you need to follow. Since PLBs use lithium batteries, they must be packed in your carry-on luggage.
Here’s what you need to know:
| Requirement | Details |
|---|---|
| Power Status | Ensure the device is completely turned off (not in sleep mode). |
| Safety Switch | Tape the switch in the "OFF" position to avoid accidental activation. |
| Declaration | Notify airline staff that you’re carrying a PLB. |
"Yes. But you should declare it to your airlines. If you try and take it as cabin baggage you risk it being confiscated due to the nature of the batteries in the beacon." – Mobile Systems
For models like KTI beacons, which can activate accidentally, use secure packaging to prevent any issues during the flight. Following these steps ensures your PLB stays safe and ready for emergencies while complying with airline regulations.
Related Blog Posts
- 10 Best Accessible Trails in New Zealand
- Ultimate Guide to Leave No Trace in NZ
- How to Plan a Trip to Accessible Trails in NZ
- Best Offline Navigation Apps for New Zealand Hikes
https://app.seobotai.com/banner/banner.js?id=67a040b2f25c0aafcf6550bb
